Monday, April 8, 2013

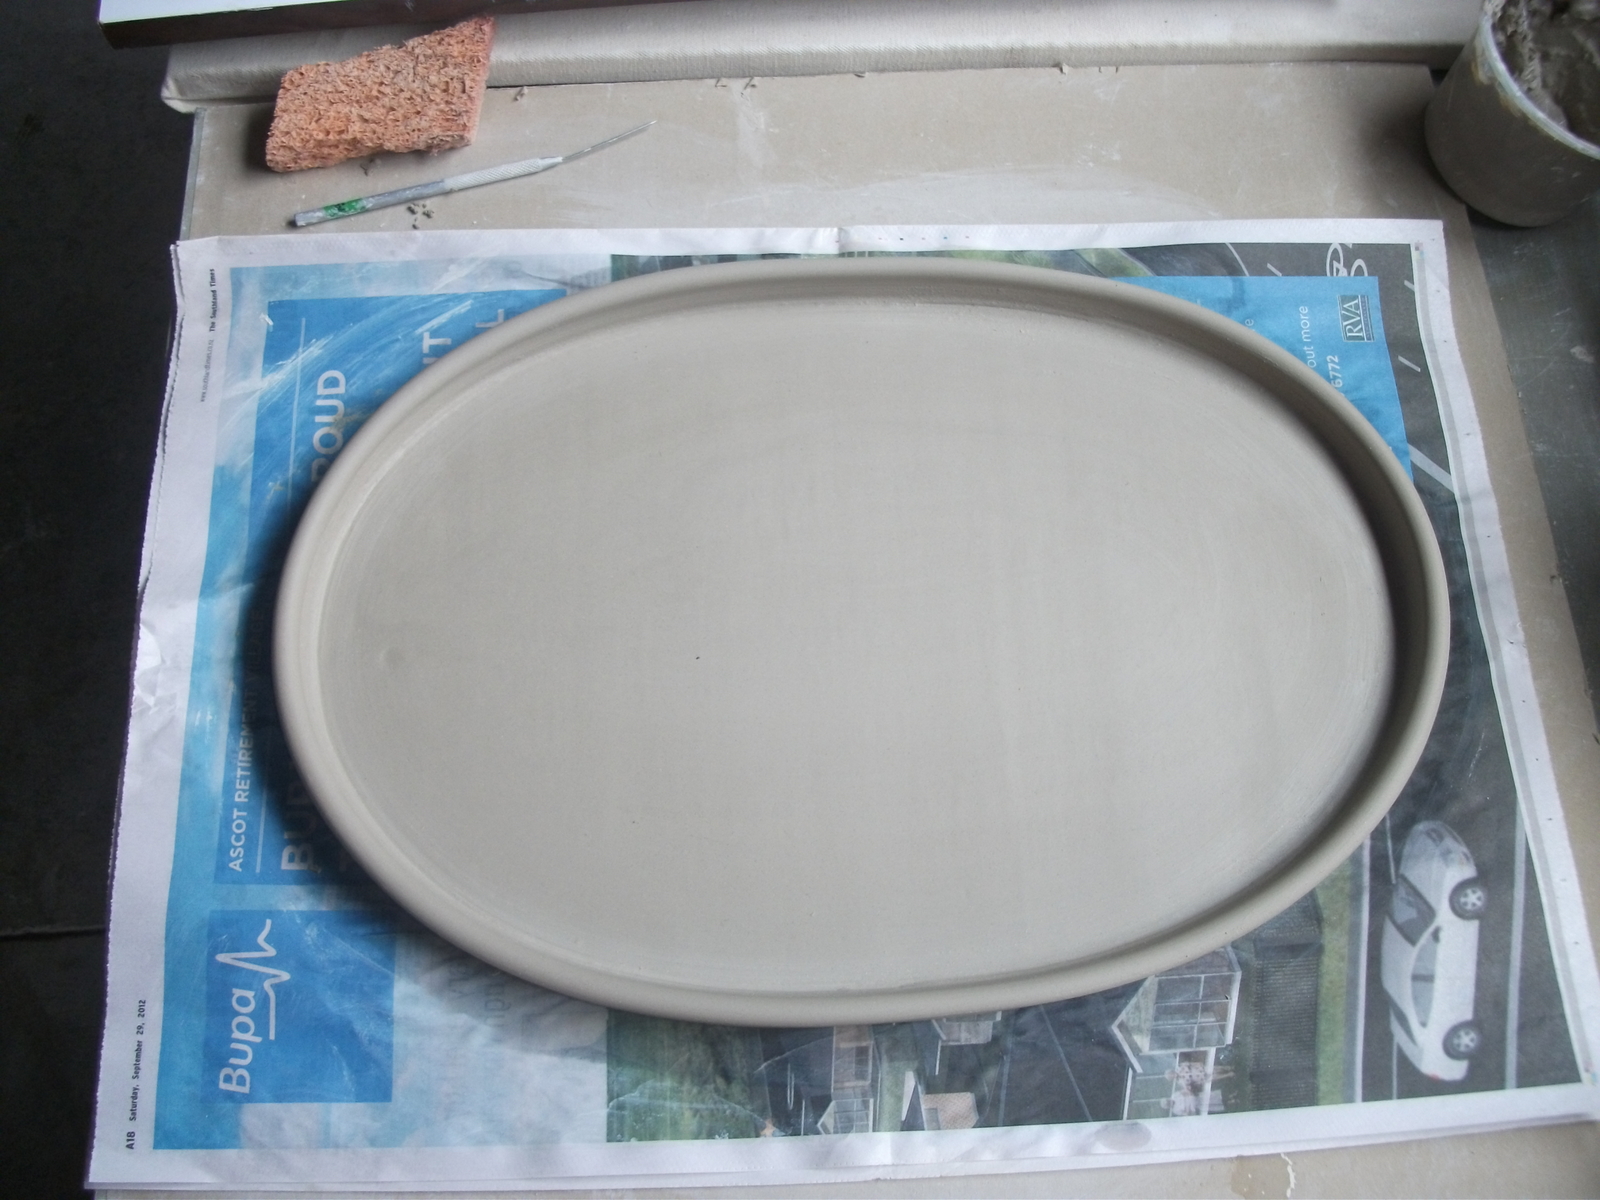
You've gotta laugh, the bonsai pot that would sit nicely on a hill


Hmmm.... what not to do when you're in a hurry to do something else.

I'd always known that clay had a "memory".

Normally I wait until the clay firms up (5 or 6 hours)  before I'd even attempt to handle it, but not this time...I was in a hurry!   So I picked up the top quickly and the ends sagged.  But I quickly put it down and carried on with the base and feet.  I thought everything would be OK as it straightened out nicely and looked like it was going to be a nice big oval pot.

But oh no...... as it dried slowly the side rose up and made a nice curve in the pot.  You can see exactly where I picked it up on the sides.

So even though you may be able to fix up any distortions in clay before it gets too firm again, the clay still remembers and tries to revert back to the original shape it was moved into.  

LESSON LEARNED....... the pot I've spent a couple of hours making is now destined for the scrap bucket.   Or perhaps I should put it somewhere obvious to remind me about what NOT TO DO WHEN YOU'RE IN A HURRY.
I've made a roundish slab pot just to see how it turns out.  Looking good so far. (50cm diameter) its done most of its shrinking now.

Its been left sitting on top of the freezer in the wash house.  Not the most practical place to put it, but its the coolest part of the house, as the "man cave" is being used for sanding down man things!
Love the texture on it.  With any luck this one will shrink down so its small enough to fit in the kiln with out having to trim it down some.  Yes, I have made the odd one that's too big to fit!!
 
 This is the pot that I've thrown just an hour ago.  Its made from a nice new clay that I'd been given to try out.  Its sooo smooth and lovely to work with.  Its just a new clay but its suited to larger pieces and has alot more strength during construction.  Keeping my fingers crossed!   This pot is about 42cm diameter at the moment in its wet state, but it'll shrink  as it dries. Not sure if I should keep it plain or put rivets on it....plain is always nice.  That seems to be what people want the most.

Any way, I'd better get back the mess I left in the garage, hubby's got truck parts all over the place, DOESN'T HE KNOW I NEED THE SPACE!

If you have any comments or want to get in touch, my email is howimakebonsaipots@gmail.com


Thursday, February 21, 2013

The kiln was unloaded this morning.  Great relief once again........ everything came out perfectly as far as I can see.

All of the big bonsai pots I've made over the last 3 weeks have been dried REALLY SLOWLY in a large black rubbish bag.  I changed the newspaper they were sitting on both the bottom and the top every day, and after the first week I opened the end a little to let the air circulate.   So far, so good.  I've just got to get them through the next glaze firing though, so only halfway there!


This larger oval tray is about 44cm long, very shallow.
A few crinkle marks in the clay from the newspaper when rolling the slab out though.


This is quite a wide oval about 39cm wide at the moment.  I decided to try not putting a drainage hole in the middle and only put them around the outside edge to perhaps make it stronger.


I love these wee mame pots. Enscribed with a Kiwi Style pattern.  Really enjoyable to make, but time consuming


This slab is about 50cm long at the moment, it'll shrink a bit more in the glaze firing, very happy with it so far.


The rest of my bits n bobs of bonsai pots.


I'll have to get out to the garage tomorrow and start on the glazing and oxide washing.  Fingers crossed it goes off without a hitch this time as well.

If you have any comments please feel free to get in touch either on this blog, or by emailing me on howimakebonsaipots@gmail.com

Friday, January 25, 2013

Some new bonsai pots - fresh out of the kiln

SOME NEW BONSAI POTS - FRESH OUT OF THE KILN


I love mornings like this.  I'm sure the heart starts beating faster in anticipation of that kiln lid opening.

This time I wasnt greeted by a broken pot.  As each kiln shelf was taken out, there was a quick sigh of relief that all the work that was put in making these pots had been worthwile.

My daughter and I took some pictures to share with anyone who may be interested.  Normally I put one or two on Trademe, but with their success and listing fees taking quite a chunk out of what I may get for them, we are reconsidering how we might go about things in the future.

Any way, back to the pots.

 The glaze on this large pot is just lovely.  Its a matt crystaline glaze.  If you look closely you can see the crystals that have grown as the pot has slowly been cooled down in the kiln.  If its cooled too quick they dont have time to grow.  Thats how I understand it happens-not sure if its right though.


People have been asking for large plain brown pots.  This one turned out quite nice as well.  Its been washed with an iron oxide mix.  You can see the throwing ridges a little from being made on the wheel.


The clay has quite a bit of grog in it for strength.  Its quite fine though.

 Another wee rustic looking pot.  You cant really see the texture too much on the photo, but there was some quite coarse grog rolled into the clay before it was shaped.  Quite nice,


The two smaller pots below had been fired previously, but I didnt like how they turned out, so I put them in again in this firing. The glaze has evened out more, and is a very nice dark brown.


I'll have to start making some more as the drying cupboard is bare yet again.

If you have any comments please feel free to get in touch either on this blog, or by emailing me on howimakebonsaipots@gmail.com

Cheers, Fionna

Wednesday, January 16, 2013

Hmmm...... has to be my least favourite job.  

Everything that doesnt make it to the kiln, (breakages, cracked pots, and disasters) get broken up and dried in large margarine containers.  When the clay's dry, I add water to cover it, and then let it soak for a day or two.  Then I tip off the excess water on top and leave the rest to evaporate away a bit more.   When its the thickness of porridge I spread it over a slab of plaster of paris or a mould  and let it draw more moisture out of the clay.  Then its ready for LOTS of wedging to get an even consistancy and get rid of any air pockets there might be.    Finally its wrapped in gladwrap and labelled ready to use again.


Finally its wrapped in gladwrap and labelled ready to use again.

Its alot of extra work, but with the price of clay these days, there's no way it can be wasted.


Just did a load of pots last night (the final glaze firing).  Hopefully it'll be cool enough to open late tomorrow maybe.  The hardest part for me is the waiting for the kiln to cool......if its opened while its still too hot you can ruin your pots with the temperature shock.  Yes, I've been there and done that!!

If you have any comments please feel free to get in touch either on this blog, or by emailing me on howimakebonsaipots@gmail.com

Sunday, January 13, 2013


Time for a bisque firing!!


I had enough dry pieces to load up the kiln tonight.  Managed to get most of them in.  A bit of space is wasted in the kiln because I havent got enough shelves of the right size.  Cant afford to buy any more just yet, so I'm just making do with what I have.   Its a bit of a pain when I have several slabs to fire as I've had some cracking when I've stacked them on top of each other for bisque firing,  as some are quite heavy.


I've just made a slab about 56cm in length, as you can see it just barely fits in with not much room to spare.  I was keeping my fingers crossed it would shrink enough in the greenware stage to fit!


Just a wee view of my drawer with all the kiln sitter cones and rods.  Alot of them  I will probably never use as they're low firing cones, but you never know when someone else might need them.  I fire my bisque to 05.  I have learnt to preheat and dry my pots for a couple of hours first to get rid of any moisture, and then set the kiln to fire for 8 hours on D setting, which is quite low.   It works out quite well.  Although I have been plagued by cracking both during bisque and glaze firing, and am still trying to work out what the problem is.  I suspect its one of several things. - drying too fast, cooling down to fast after firing (dont always get up in time to put the peep hole plug in), perhaps using too much water when I'm throwing the pots maybe?  

I've started using a new clay with alot more grog, so I'll keep my fingers crossed that the  cracking problem improves soon.                                                                                  


Here's a couple more pots that are almost dry enough to go in the kiln.  I put these inside in the wash house for a couple of weeks  so they would dry slowly.   The garage just gets too hot once the sun comes up and heats the steel.  Even with the new pots being covered they heat up too much and the drops of condensation fall of the inside of the plastic covering them and makes the drying quite uneven.

Anyway,  I'll post some pictures of the pots when they're taken out of the kiln, fingers crossed that theres no fatalities!

If you have any comments please feel free to get in touch either on this blog, or by emailing me on howimakebonsaipots@gmail.com

Wednesday, January 9, 2013


I was "kicked out" of the house about 6 months ago.  I guess the rest of the family didnt appreciate me covering the kitchen table with clay and bits of half finished bonsai pots.  A few meals were eaten on the sofa as I couldnt (didnt want to) shift anything off.    Luxing up clay that had accidentally dropped onto the carpet and had been stood on, was another matter entirely!

Anyway,  I've now taken over some of my husbands garage.  Just a little at first - a table and a shelf.  Then a little bit more - room for a kiln.  It had its advantages for him though.  In order for the kiln to work we had to get power put in the garage, something we hadnt got round to for 5 years! So I think that soffened the blow of me pinching a bit of his space.


I've taken some pictures of my wee (large) corner.  Pictured are some of the pots that I've made, mostly smaller as the larger ones dont seem to stay around long.


A few pots drying, almost ready to be fired.  I usually cover them with an old sheet to stop the dust and stuff that gets blown in the garage doors when hubby's working in there.

A few more pots drying, have uncovered them to take photos.


About to add the bottom onto a shallow bonsai tray.

All done. 

Trimmed up the edges

Added some tying in and drainage holes.  Not sure if they're large enough.  The larger I make the drainage holes, the higher the chance of cracking.  Not sure what I'm doing wrong yet!
I've left this one well covered up to dry slowly......hopefully it wont warp too much.

If you have any comments please feel free to get in touch either on this blog, or by emailing me on howimakebonsaipots@gmail.com

Friday, December 28, 2012

To Help and Encourage Potential Bonsai Potters

I needed to find out how to make my own bonsai pots, and with a lot of potters being a secretive lot, it was easier said than done.

So I thought I'd share my ups and downs on this ever evolving journey


If you have any comments please feel free to get in touch either on this blog, or by emailing me on howimakebonsaipots@gmail.com


Don't forget to have a look at:
BONSAI POTS FOR SALE