Friday, April 11, 2014

Some New Shelves and Bonsai Pots


I was getting a bit sick of squishing up my pots together onto the two shelves in the husbands man cave.

Splashed out a whole $19.85 each at the Warehouse and got myself 2 sets of aluminium shelves.  The other two were screwed to the garage wall and the workbench so it was only a matter of screwing the two new shelves to them as well.   You just never know when an earthquake might strike and rattle these pots to a sad ending on the concrete floor.

Its much easier to see exactly what you've got, instead of lifting up/moving over and shuffling them around. 


It was all good for me, but the realisation that his garage space was being decreased a little more, made me feel a tiny bit guilty.

In an act of defiance or marking his territory, I noticed a mower in pieces plonked fairly and squarely in what was once his parking space.  Almost as if to say no more space for you....THIS IS MINE!   Oh well..... perhaps when he's at work I might just give his mower a tiny wee nudge further over, after all I need room to move about. 
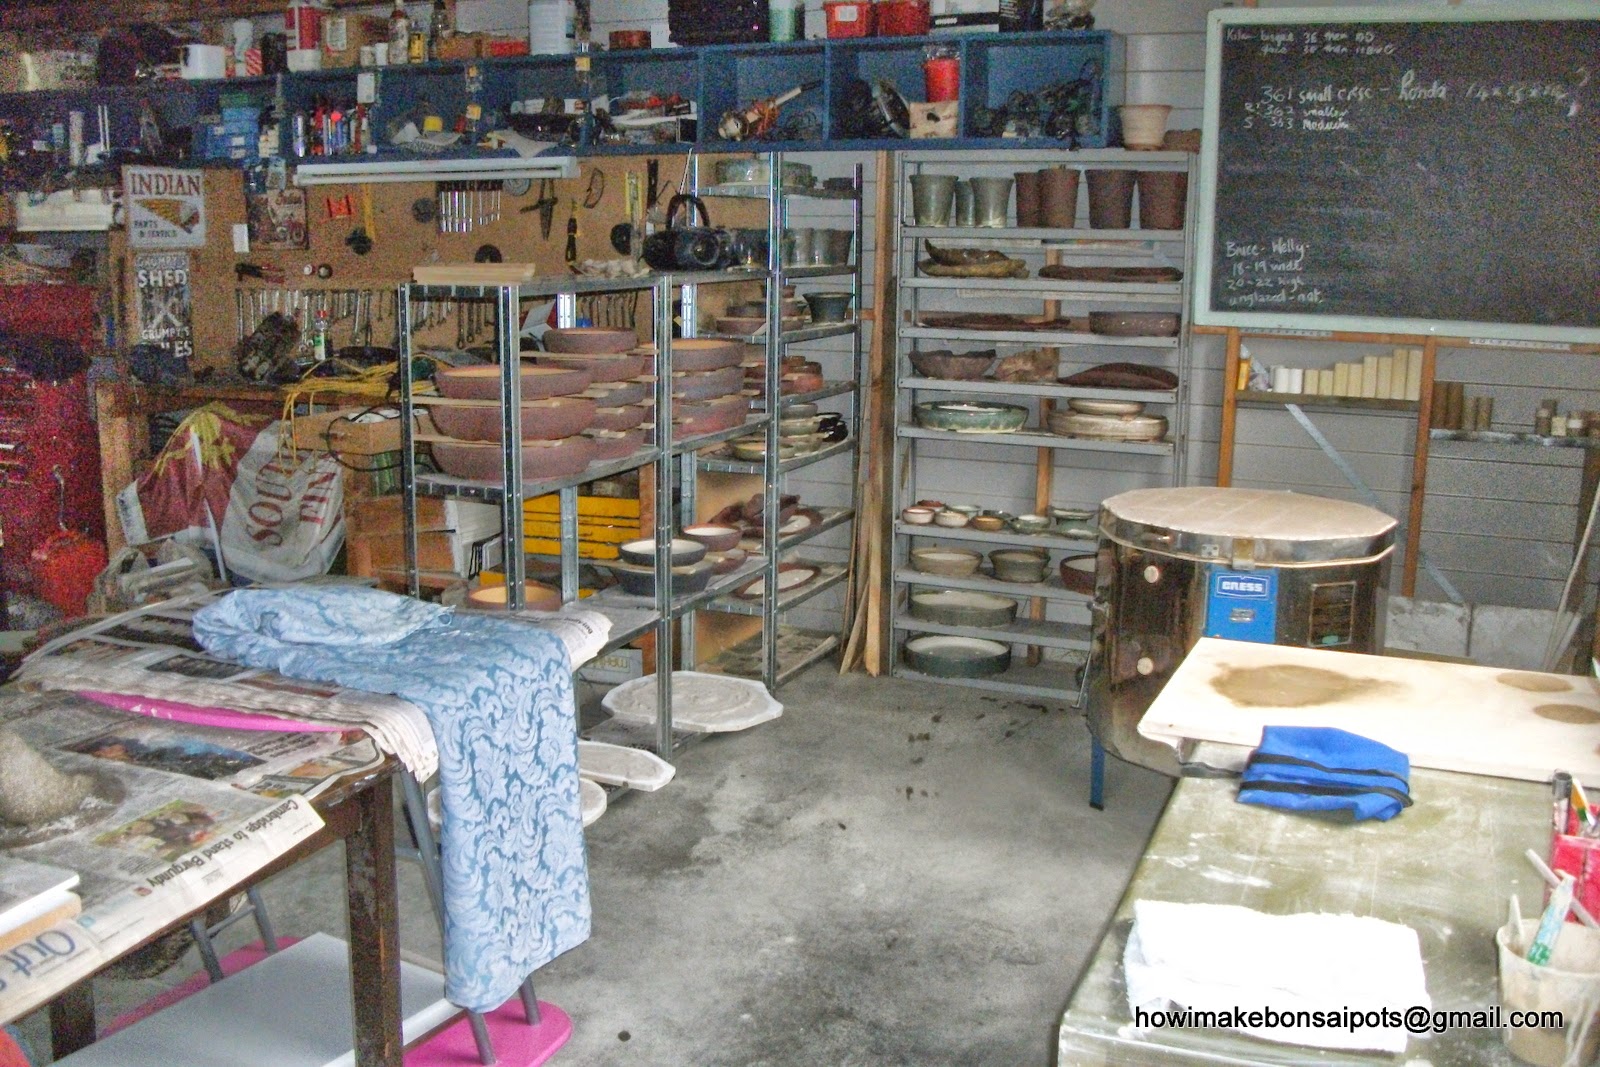

The big plan was to make quite a few more pots so I could get rid of my old plastic containers that are floating around my bonsai area....yes, I was going to keep more for myself this year.  I made a few large ovals and round bonsai pots.  However it doesn't seem to be enough and I have plenty of gaps once again.  The beauty of it is that I can always make another.


I seem to be accumulating a few of the smaller pots.  Some are made to test out glaze experiments and others are to try out new shapes and textures.  I know I wont use them myself as our annual shortage of water makes keeping too many small potted bonsai a risky business.  However, they are lots of fun to make.


These wee cascade pots I made turned out to be quite a revelation.   The glaze on them had lots of room to move down.  It gives them a bit of life and character instead of a plain block of lifeless single colour.


I seem to be having a bit of a run on the textured dark brown pots.  I've tried using a couple of different oxides and have found that some react quite differently when a glaze is put over the top.   Others look good with out anything, the texture speaks for itself.


The kiwi style pots seem to face a bit of opposition.  I can guarantee that if I'd put a Chinese or Japanese marking on them they would more popular.  Yes I know that bonsai originated from these countries and that tradition has alot to do with what people think is acceptable as far as pot styles etc go, but what is so wrong with trying to create your own style?  Are we all too scared of being told that "that's wrong you shouldn't be doing that"  Frankly, I don't enter in serious shows or conventions, its my garden, my trees, so whats wrong with using something that I like. 

Anyway, I'd better think about what I'm going to make tomorrow.  After all, if I don't fill up these new shelves I might go out one day and find them filled up with HIS tools - the battle over garage dominance continues!!


Monday, March 3, 2014

Some New Pots Just Out of the Kiln

The kiln was unloaded a few days ago, and a couple of pots caught my eye for different reasons.

I love glaze colours that run into each other and mix and mingle.  Single block glaze colours would be my worst nightmare.  But thats just personal preference, everyone's different.

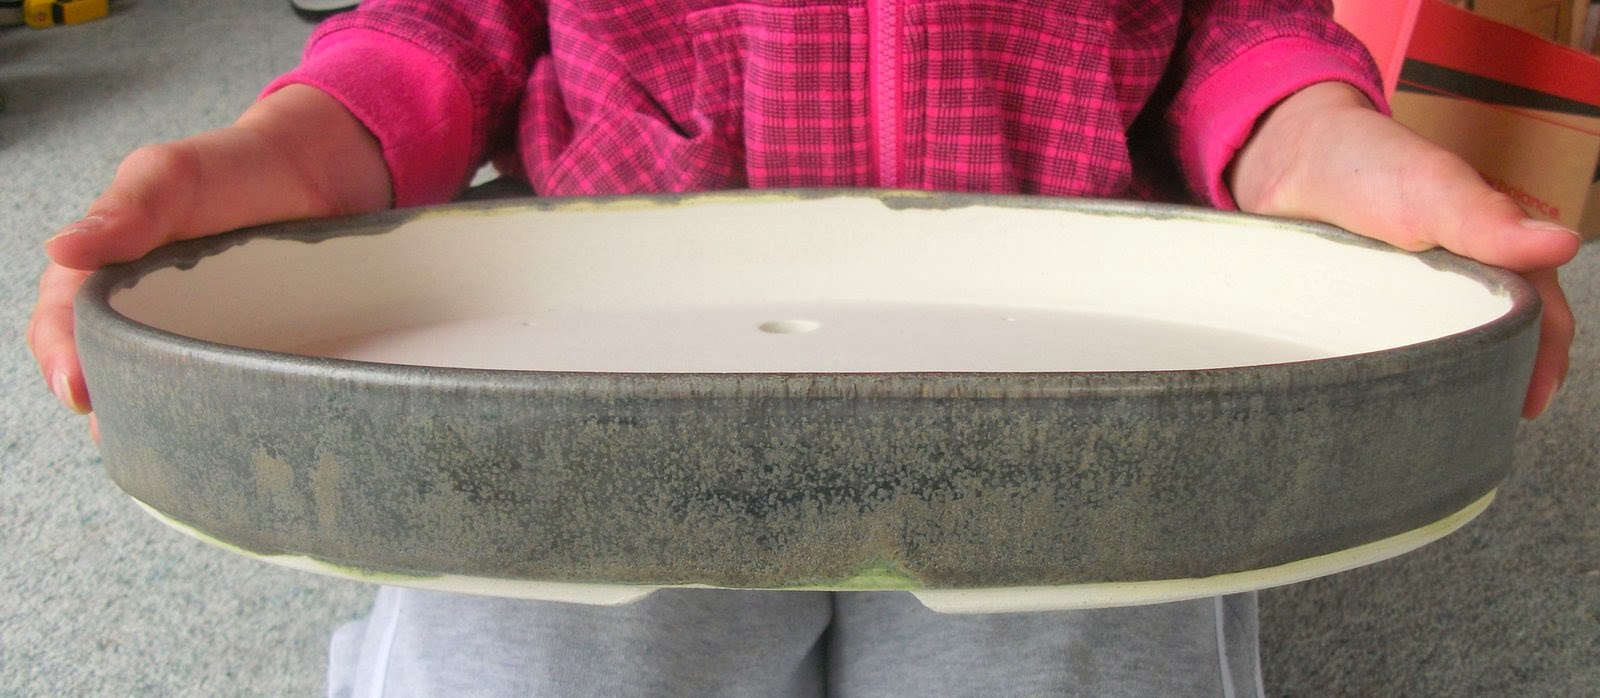
The pot below has a glaze that I added iron spangles too.  Just for a bit of an experiment to see what would happen. Iron spangles although quite fine, tend to sink to the bottom of the glaze bucket, so if you want them in your glaze, be prepared to stir it alot.
You can almost see the iron spangles melting and flowing down the sides.  I scraped the sides of the glaze bucket and brushed some "extra" along the top rim.

Another pot that I really love is a "kiwi style" oval.  Yes, I know that plain and subdued is the way that many like their pots, but sometimes I like to do something a little different.  I've made a few smaller ones of this same style, so decided to sit down and concentrate for half an hour and carve out this pattern around the rim.

The Japanese and Chinese have beautifully painted and decorated pots showing their past history and culture.  Perhaps little old New Zealand should start tinkering with their own style too......just a thought.

If I want to make a decorated pot like this, I have to think ahead a little as my normal clay has a little more grog which tends to snag and tear if you try and carve out a design. It's a bit of a catch 22, as the finer the clay is, the higher the likelyhood of cracks appearing during firing, especially on large pieces.

Any way, back to the garage, I've got another oval half done.  Just waiting for it to firm up a little before tidying up the bottom and feet.

Thursday, February 20, 2014

Bonsai Pot YouTube Videos

Just for the curious, I've done a couple of Youtube videos showing a few of the bonsai pots that have been made over the last month or two -  unloading the kiln, my workspace (um...actually my husbands man cave, but I've taken half of it over!)  

I apologise for the quality, as I just use a cheap wee camera, and haven't quite got the hang of the editing just yet. Hmm...perhaps I should just stick to making pots.

Here's the links https://www.youtube.com/watch?v=BTODN8Y_iO4


https://www.youtube.com/watch?v=AcsZjzo-XiE


Friday, January 24, 2014

Fired Crackled Bonsai Pots


Really pleased with the textured fissured effect on this one, it's one of my favourites.

This one started out with a brown wash on it, but with a layer of clear glaze over the top it fired to a very dark green colour in the crackled fissures, so it pays to experiment a little.


This was a surprise as well as the clay mixture (experiment) went quite buff with the clear glaze over it.  Once again the brown was in the cracks went a black colour in the final glaze firing


This was another experiment mixing different clays together at different percentages to see if I could change the fired colour.  With a clear glaze over it, it fired to a chocolate brown.  The pot also has a bit of a "chattered" texture to it, something else that I'm experimenting with at the moment.

Sunday, November 24, 2013

Thursday, October 24, 2013

Pots Just Started

After a reasonably quiet winter as far as making pots go, I decided to get my backside into gear and start creating again.

During the winter there were a few changes made. I've been experimenting with a couple of new clays, and even mixing different types together at different percentages.  Trying to get the best of both, lower shrinkage and strength.

I'm also waiting on a bit of an  upgrade as far as my kiln controls go.  At the moment it just relys on the kiln sitter to control the heating and shut off etc.  But because I want to have a more accurate guage of the temperature and enable a slow cool down period for crystal glazes and also a slower cooldown to avoid cracks, its inevitable that I need an uptodate electronic kiln controller and probe etc.

This comes at quite a cost (almost half way there!) but with my brilliant mentors advice, I feel it will be money well spent.   I had to laugh.... he said he could put up with me having a crappy kiln as long as I had a good controller etc! Its good how some people just tell it how it is.

Any way, back to these pots.


This is the first rectangular type bonsai pot I've attempted.  The top sides were thrown as a bottomless circle on the wheel.  Then when it was still fairly soft I pulled the sides out to make the general shape.  Its not absolutely milimetre perfect, but its good enough for me.  Then the bottom was rolled out and added along with the feet.   Its incredibly hard to get all of the pieces the same as far as dryness goes for assembling together.  I know they say not too, but I do use the hair dryer to speed things up a little.

This ones about 36 long by 27cm wide


This  ones an oval approximately 41 by 31 wide by 7cm high.


I've been shying away from putting a drainage hole in the middle for the time being, as if they are going to crack it usually starts at that hole for some reason. I guess it sets up a weak area structurally.


These will sit quietly in the wash house drying over the next couple to three weeks.  I usually cover them with a piece of canvas or material to slow the drying right down after I take them out of the usual black rubbish bags.

Time to go, kids are home from school....only seems like a couple of hours since they left!!

Thursday, September 26, 2013

Stress Cracks during Clay Drying


I've always been bothered by "stress cracks" - they dont normally show up until they're bisque fired.

I popped around the corner to get a pen and spotted our precious wee Millie doing a bit of snoozing in one of my bonsai pots.  She wasnt too impressed being woken up and was quite keen just to sit where she was.  The pot was obviously warm and dry and was a nice place to spend the afternoon.

Now I'm not sure just how much she weighs - and the pot was dry - she wasnt jumping round pretending to be a kangaroo, so hopefully no damage has been done.  Had a good look after she slinked away in disgust, apart from a couple of cat hairs, no cracks were found........lucky this time!!!!!


Hmmmm..... perhaps these pots will turn out "purrrrrrfect"

Wednesday, August 28, 2013

A Broken Pot is a Useful Pot


Have you ever broken a bonsai pot or slab and ended up throwing it in the wheely bin?

Many of us have.

Too many of us think that if a pot isnt "perfect" that it will never look any good with our tree in it.

Recently, I was asked if I had any broken/cracked bonsai pots that I was going to chuck out.  Hmmm... strange question I thought.  Normally people want solid unbroken uncracked pots-brand new.

On questioning him he was adamant they would definitely have a use.  So I quite happily gave him a couple of rejects from my latest kiln firing.

I got an email from him recently  with a couple of pictures of his latest bonsai creation using a slab that had broken during the high firing.

Now this bloke is obviously talented.  To think outside the square and make use of these two pieces of pot and create a beautiful forest/group planting of beech is something to be proud of.

Here is a picture of the beech planted up on a "one piece slab" (broken one pushed together)


Looks great dont you think!  But look below


In my opinion, I think this looks even better, two separate plantings but still with the one group.
The river/stream is imagined between them.

 I managed to get him to agree to put his name to this creation....well sort of, he's about to start out his own bonsai venture and  is going by the name of Fredric Bonsai.   If you want to get in touch with him, I may be able to pass on any queries.  Better still, I'll see if he wants me to add his email address!

So the next time the dog/kids/wind/rugby ball knocks over one of your trees and breaks the pot/slab,  take a good hard look at it first before turfing it in the bin.  Nature isnt perfect, after all,  isn't that what we are trying to recreate?

Tuesday, July 9, 2013

Cost of making a bonsai pot

People often ask me how much it costs to make a bonsai pot.  There are so many factors to consider.  If I was making mass produced pots of a certain size, shape, glaze etc it'd be easy enough to work out. Well, not easy, but easier than working out the cost of the way I make my pots.

I don't have a set size, they are all different.  Sure you can weigh the clay before you make the pot on the wheel so you know how much you are using, but when you trim the pot up when its leather hard, you're taking clay away. Wet clay is heavier than leather hard or dry clay, at what stage do you weigh it? All too complicated and not what real pottery is about.

I'll list some of the costs.

CLAY
One of the 2 biggest expenses, freight from one end of the country to the other on top of the price of clay makes it very expensive for the hobby potter, we don't get big discounts like clubs do. I like to use 2 or 3 different types of clay, depending on what I'm making, all different prices. Nailing down the best clay to use and getting the results you want, also means alot of experimenting, and also if not successful, a bit of wastage.  I'm very lucky in that I have a mentor who is helping me out with a variety of different clays to get the best results.


 POTTERS WHEEL              
 I feel that you must learn how to use the wheel with some confidence. Its really an essential piece of machinery to have if you're wanting to make different types of pots.


WHEEL BATS AND ACCESSORY'S
You need many different sizes of these to make a variety of work.  Used both on the wheel and for drying on.

TOOLS
May need replacing regularly if using grogged clays. Although you can purchase some quite cheap basic tools, if you want them to last a bit longer,(sharpness) it pays to get better quality ones.

ELECTRICITY
This is another BIG expense in New Zealand.  My average bisque firing takes at least. 9 hours, and then the glaze firing can take as long as 12 hours depending on the temperature the clay matures at. Stoneware clays fire higher therefore costing more.  With our power prices increasing regularly over the years, many potters are moving on to other areas.

GLAZE INGREDIENTS
If making up own recipes the colouring oxides and materials are expensive to buy.   Premade glazes in powder form can be bought at a cost, but making your own generally works out cheaper if you have the materials.  I don't use brush on glazes as I like the more spontaneous look of a poured on glaze.  Brush on glazes dont work out to be very cost effective if you're making large pieces. Thats just my opinion anyway.

KILN
This is another must, if you are serious about making pots.  You might say that why don't you just use the local Pottery Club kiln, it'll work out cheaper than buying your own kiln.....wrong....in the long run it doesn't.   Apart from the cost, you have to take into consideration the cost of travel to and from using the kiln, the transporting of fragile greenware, working in with others using the kiln etc. etc. In my case a 68km round trip to the pottery rooms, the cost of petrol in New Zealand is very high and still rising.  Its so much easier to be able to do a firing when you're ready and not have to rely on others.  That's a big must for me, as I like to be independent and not bother others.

 KILN SHELVES, PROPS, FURNITURE
 Even though most kilns will come with some shelves, furniture etc, its never enough.  Because bonsai pots are shallow, you are able to put more shelves than normal in the kiln to make it more cost effective.  With more shelves means using more props etc.
 
FIRING CONES/RODS
Firing cones are good to use to check the temperatures are correct.  My kiln uses a kiln sitter, so each firing uses a small rod.  These aren't cheap either, and come in box's of 30 if I remember correctly.

CRACKED DAMAGED POTS
that will have to be binned!  Especially relevant when making larger bonsai pots, the bigger the pot, the more chances of cracking etc happening  during firing, so that's a pretty good reason why you don't see alot of potters making very large bonsai pots.

MY TIME (LABOUR)
If the cost of my time was added onto the cost of the bonsai pots, nothing would sell, as it would be too expensive for most.  Making a large oval pot can take 2 or 3 hours of careful hand building to get it to an acceptable standard.  Then theres the drying time and constant turning to make sure they dry evenly.

I think I just need to stop there...........I'm sure there are alot of other small expenses I haven't thought of. But I'm kind of thinking that most will say why do you bother.  Sometimes I wonder that myself, if I'm lucky I might break even with the total cost of most pots.

Why do I do it?.......because I enjoy it,  there's something  very calming about sitting at the wheel creating something.  Sometimes its spontaneous, sometimes its with a purpose in mind, but either way,  I plan on continuing making these bonsai pots.... it just feels right.  I've learnt to trust my instincts.

As far as cost goes, everything has a cost....... but if you really want to do something , there will always be a way!